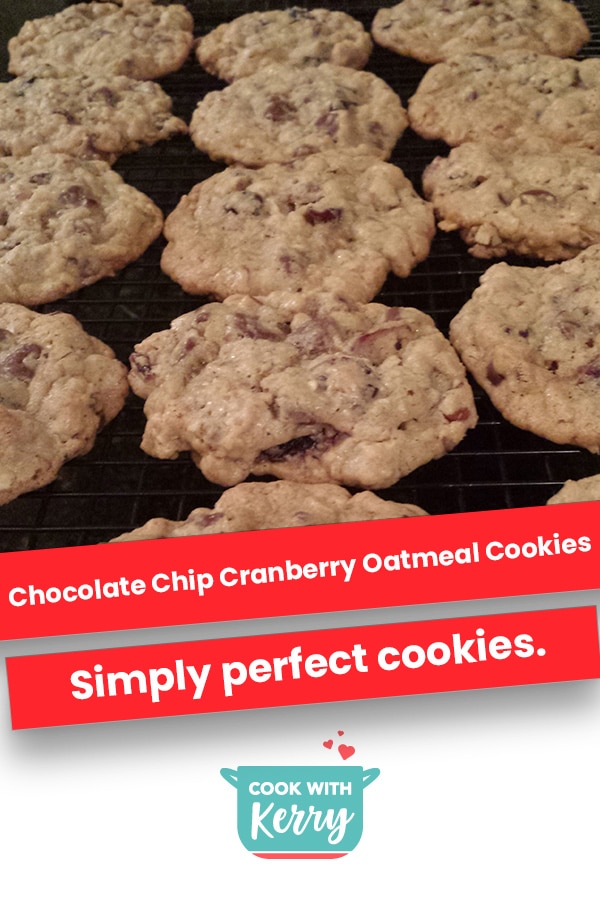


Chocolate Chip Cranberry Oatmeal Cookies
Chocolate Chip Cranberry Oatmeal Cookie Time!
Tonight, as I was cleaning up the kitchen, I got the urge to bake. Probably because our cleaning service came today and the kitchen is in tip top shape. It’s always nicer to cook when the kitchen is sparkling.
As I mixed the cookie dough together, I thought of all of the tips I have learned over the years that have helped me become a better baker — and I figured, I should probably share (at the risk of losing the next work bake-off!) Now, I’m not even close to having the skills of a professional pastry chef. My baking leans more toward the simple side of things — I don’t have patience to make spun sugar or make a cake look like the Eiffel Tower. But still, there are a few tips that I think help make baking easier and tastier.
♥ Related: Chocolate Chip Bundt Cake
My Baking Secrets
I don’t sift my dry ingredients. Like. Ever. I use a whisk to mix my dry ingredients together well. I think this does a fine enough job aerating the ingredients and getting any lumps out. I’ve literally never had an issue because I haven’t sifted.
I often add extra salt. Now, if I’m making yeast bread, I definitely don’t do this because salt plays an important role in how yeast chows down on the sugars in a bread dough. And if I were making something delicate, I probably also wouldn’t add extra salt. But for hearty baked goods like cookies, brownies, and bundt cakes, I like extra salt to help bring out the flavors and create a yummy salty and sweet flavor. For instance, the recipe I riffed off for these cookies called for half of a teaspoon — I doubled that.
I cream my butter and sugar for 7-10 minutes. I don’t think most people cream butter and sugar long enough. It’s a tip I’ve picked up from taking classes at King Arthur Flour, reading a lot of recipes, and watching a lot of cooking shows (Alton Brown, specifically.) Creaming your butter and sugar well means the mixture is aerated better and you get lighter cakes and cookies. Usually, I’ll get my butter and sugar creaming — then mix my dry ingredients. Recipes generally instruct to sift (ahem, whisk) dry ingredients, and then deal with the butter and sugar. But, if I’m going to let the creaming stage run for a bit, it makes sense to me to switch the order to use my time most efficiently. Also, I make sure I scrape down the sides of the mixing bowl a couple of times during the creaming process so that all of the butter and all of the sugar get mixed.
♥ Related: Apple Upside-Down Biscuit Cake
I defrost my butter. Many recipes call for softened butter. I usually get the desire to bake on a whim (see: tonight.) This means my butter comes straight from the fridge. But softened butter incorporates with the sugar easier and quicker. I’ve learned that if I put a stick of butter in my microwave on the defrost setting for 15 seconds — stopping half way to flip the sticks — I have perfect, softened butter. All microwaves work differently, so I suggest defrosting in 5 second increments until you know how long your microwave will take. You want soft, but not melted!
Chocolate + coffee + cinnamon = happiness. Usually, if I’m making a chocolate cake or brownies or chocolate cookies, I’ll add instant espresso (a tablespoon or so in with the wet) and cinnamon (a teaspoon or so also in with the dry.) These two secret ingredients help elevate and intensify the chocolate flavor — and I think it’s why I get rave reviews about my brownies.
My two favorite tools for baking: a disher and parchment paper. I own three disher sizes that allow me to equally portion cookies and cupcakes. A disher also makes frosting cupcakes easier (unless you want to get fancy and pipe your frosting.) And because the disher offers a spring-loaded release, doughs and batters release from the disher much easier than using a regular spoon. For more on dishers, see comments below. Parchment paper is key for easy clean-up and ensures your baked goods don’t stick. I like the half sheet size for ease. A good quality parchment paper can be a bit pricey, but can be re-used a few times. Also, lining your cake pans with circular sized parchment (or cutting to fit) will make you breathe easier when turning your cake out of the pan.
Those are my best tips. I hope they help you in your baking adventures. Now, on with the recipe for chocolate chip cranberry oatmeal cookies.
Chocolate Chip Cranberry Oatmeal Cookies
Ingredients
- ¾ cup butter softened
- 1 ½ cups brown sugar
- 1 ¼ cup all-purpose flour
- ¾ tsp baking powder
- ½ tsp baking soda
- 1 tsp salt
- 1 tsp ground cinnamon
- 1 tsp ground ginger
- 1 tsp dried orange peel
- ¼ tsp ground nutmeg freshly grated is best!
- 1 ¼ cup rolled oats not instant oats
- 1 cup dried cranberries
- 1 cup semi-sweet chocolate chips
- 1 cup chopped pecans
- 1 tsp vanilla extract
Instructions
- Preheat oven to 350 degrees. Line two half sheet pans or cookie sheets with parchment paper.
- In the bowl to your mixer, add the butter and brown sugar. Mix with the paddle attachment for 7-10 minutes or until the butter and sugar is light and fluffy and thoroughly combined. At least once during this process, scrape down the sides of the bowl to ensure everything is incorporated.
- While your butter and sugar is creaming, mix the flour, baking powder, baking soda, salt, cinnamon, ginger, and nutmeg in a medium bowl with a whisk to combine well.
- In a second medium bowl, mix the oats, cranberries, chocolate chips, and pecans. Give a good stir with a wooden spoon or spatula until everything is well combined.
- When the butter and brown sugar is well creamed, add the egg and vanilla. Mix until fully incorporated. Then add the flour mixture slowly until combined. This will take about 30 seconds or so. Finally, add in the oats mixture, and mix until combined.
- Use a medium disher to portion cookies — 12 to a sheet pan spaced about 1 1/2-2 inches apart. Press down on the scoops to flatten slightly. Bake for 10-12 minutes. The cookies will be done when they start browning around the edges and have just the very slightest look of wetness to the top. Cool for a few minutes on the sheet pans before moving to cooling racks.
This post contains affiliate links. I may make a commission on qualified purchases from affiliate links that you click. Affiliate commissions help support this site so that I can keep bringing you great recipes, kitchen hacks, and product reviews.


 Fruit Salad with Honey Citrus Vinaigrette
Leave a Reply